Looking to give your yard a new look, but not sure where to start? Landscaping has several elements that work together to create the unique look you see on Pinterest- there are hardscapes, greenscapes (plants), and lighting. Hardscapes are the “hard” pieces of the landscape like walls, benches, walkways, and patios, and after proper planning, they’re exactly where you need to start.
There are many different things to know if you’ve never worked around hardscapes before. Since our garden store in Marshfield carries a wide variety of hardscape material, we thought we’d write up some facts, tips, and terminology to get you started on the right track.
- You can use a variety of materials to build your hardscapes.
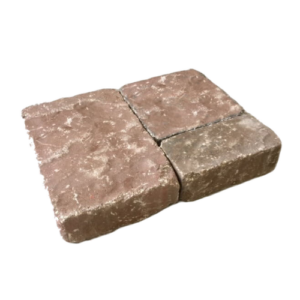
- Natural stone is a beautiful material to work with and can create some pretty amazing patios and walkways. There are lots of different types of stone, from patio stone (used for walking on) and landscaping stone (used for edging and dry stacking walls), to steppers (long and wide for stairs) and slabs (for impressive entryways). The disadvantages of working with natural stone are a higher price and non-uniformity (which actually does create a more organic look).
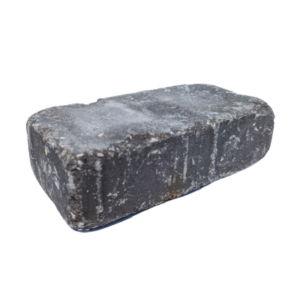
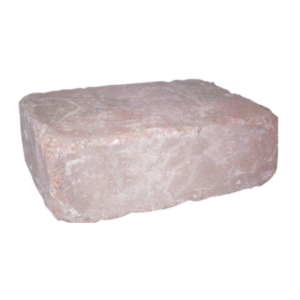
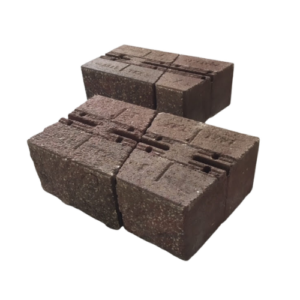
- Retaining wall blocks, or just “blocks”, are created in a factory using cement and aggregate (pieces of rock). They’re wide and tall, making them the easier choice for building retaining walls. Blocks are less expensive than natural stone and create a more uniform and modern look. Look for a variety of shapes, finishes, and colors to create your outdoor vision.
- Pavers are flat and wide, used for creating outdoor floors like patios, walkways, driveways, and pool surrounds. They are also created in a factory using cement and aggregate, and can be found in various shapes, sizes, colors, and finishes to match any project.
- Blocks and pavers are measured in square feet. When you see a square foot measurement, it is the area of the visible side. For blocks, this is height x width as looking at a single stone in a wall. (Depth is the unused measurement in this equation.) For pavers it is length x width, looking down at a paver in a walkway. (Thickness is the unincluded axis here.) By measuring square feet like this, you can always tell how many of an item you need to cover a certain area.
Blocks & Retaining Walls
- A “course” is a layer of horizontal blocks that makes up the wall.
- When calculating the number of courses and blocks you need based on a final wall height, don’t forget to include wall cap height and a partially underground base course.
- The “face” of a block is the finished side you see. Some products are single-faced to be used as a retaining wall where you won’t see the back. Other products are dual-faced for use as free standing walls, corners, or at the end of a wall.
- A freestanding wall is used to separate areas, while a retaining wall holds the earth back on a slope.
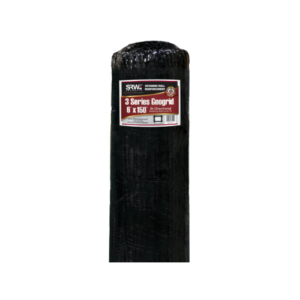
- How does a retaining wall stay in place? Large retaining walls require engineered drawings to be sure the right materials are used. For smaller retaining walls, gravity does all of the work. You can build up to a 4 foot tall wall (if done correctly) without any supports besides adhesive. Gravity pulls each heavy stone down and keeps the blocks in place. Going higher than 4 feet? Use Geogrid!
- Geogrid is a PVC mesh that comes in rolls, made specifically for retaining wall construction. You place one edge between blocks, and the other edge stretching back away from the wall into the hill. The downward pressure of the fill rocks helps keep the retaining wall from heaving out.
- Water is your biggest enemy when building retaining walls. Dirt absorbs water and swells when saturated, which will put unwanted pressure on the back of the wall. The dirt and the rocks in the hill behind it are pulled downward by gravity, and don’t want to move. Water is a different story because it’s always on the move. Meanwhile, gravel and sand don’t swell or retain water, so the wall will be subjected to less pressure. This decreases the risk of cracks and damage. Building your retaining wall with the right backfill and drainage could be the difference between a failed wall and one that lasts generations.
- If you’re going to build a very tall wall, you’ll want a heavy block. Utilizing hollow core blocks like the VyKing allow for less weight when transporting and positioning. Once you fill the core with gravel, they’ll act as though they were solid blocks.
- Tall retaining walls should be built with a slight tilt toward the hill called a setback. To align blocks in retaining walls, manufacturers have come up with several options.
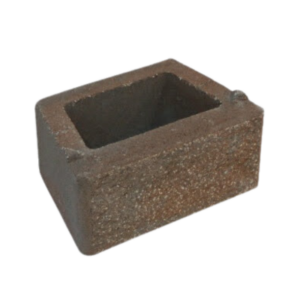
- Some blocks come with a lip on the bottom back edge of the block. This lip will ensure that each layer sits about ¼ – ½” further back than the layer beneath it. Our Mesa Adobe blocks are an example.
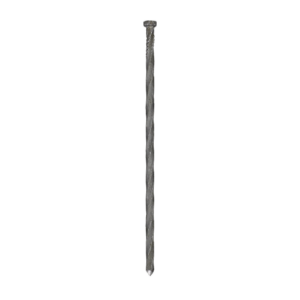
- Some blocks utilize a pin and hole system. By hammering a pin through a block and into the block below it, you can be sure the block is in place. Our MaytRx blocks are an example of this
- Other blocks utilize a raised segment in the bottom of the block with a matching indentation in the top of the block so they fit together like a puzzle. We call this interlocking. Our VyKing blocks are an example of this.
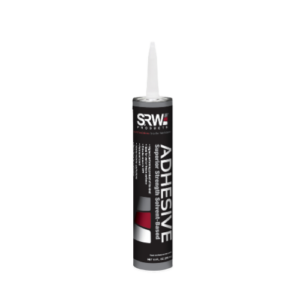
- When should adhesive be used on a retaining wall?
- Dry stacking natural stone does not require alignment or attachment (but these should only be short walls anyway).
- For short walls without any sort of alignment mechanism (like our Simplicity block), an adhesive can be applied in a ⅜” bead between block layers.
- Kevin recommends using adhesive on all walls (besides natural stone) no matter the height to ensure the blocks stay in place.
- Retaining wall caps should always be installed using adhesive.
- Some blocks are sold as “systems” (like our MaytRx line) with several blocks sold as one unit. They’re made to be put together in one or more patterns to achieve a more randomized look.
- If your wall design includes curves, choose blocks with a larger taper from front to back, like VyKing, MaytRx, or Pyzique.
- Can homeowners build their own retaining walls? Of course! But there are several things to keep in mind before making the decision:
- Can I properly research best practices and not take any shortcuts?
- Can I transport the block size of my choice, and then lift it to position in the wall?
- Can I properly excavate behind the wall?
- Can I get backfill gravel to the location where it’s needed?
- Can I install drainage and/or Geogrid to ensure longevity?
- If you want a professionally built retaining wall, contact our sister company, Custom Creations, for a quote!
Pavers
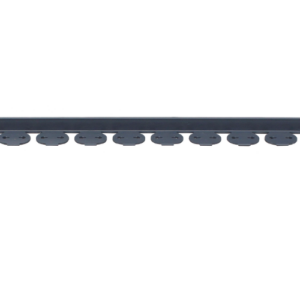
- Driving isn’t recommended on all pavers. Look for pavers with a thickness of 3 ⅛” or more for use on a driveway or even a walkway that will host golf carts.
- Pavers are pushed all the way together, unlike indoor tile. There will always be a little space between pieces due to built in spacers on the edges of the pavers. This space will hold the polymeric sand.
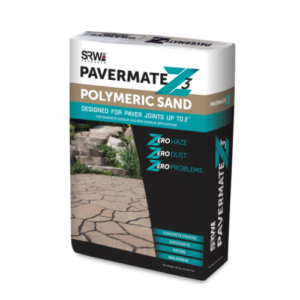
- Polymeric sand is sand that’s coated in a polymer that turns hard when it gets wet the first time. It’s applied between pavers for a few reasons:
- Locks pavers in place to prevent movement
- Less of a chance for weeds and insect infestations
- Won’t blow around or wash out like plain sand
- If installed properly, polymeric sand should last about 10 years. Make your gaps as narrow as possible.
Misc.
17. What’s the difference between spikes and pins? Spikes are used to anchor paver rails, while pins are hammered into holes in retaining walls to position them correctly.